Build guide
How to Build an Aquaponics System
 By Frank Wood · Updated
As an Amazon Associate we earn from qualifying purchases. How we choose products.
On this page
- How an Aquaponics System Works
- Step 1: Choose the Location
- Step 2: Choose the Type of System
- Step 3: Size the System
- Step 4: Gather the Components
- Step 5: Build It
- Step 6: Fill and Cycle the System
- Step 7: Add the Fish
- Step 8: Add the Plants
- Step 9: Look After It
- Common Problems and How to Fix Them
- DIY or a Ready-Made Kit?
- How to Build an Aquaponics System: FAQ
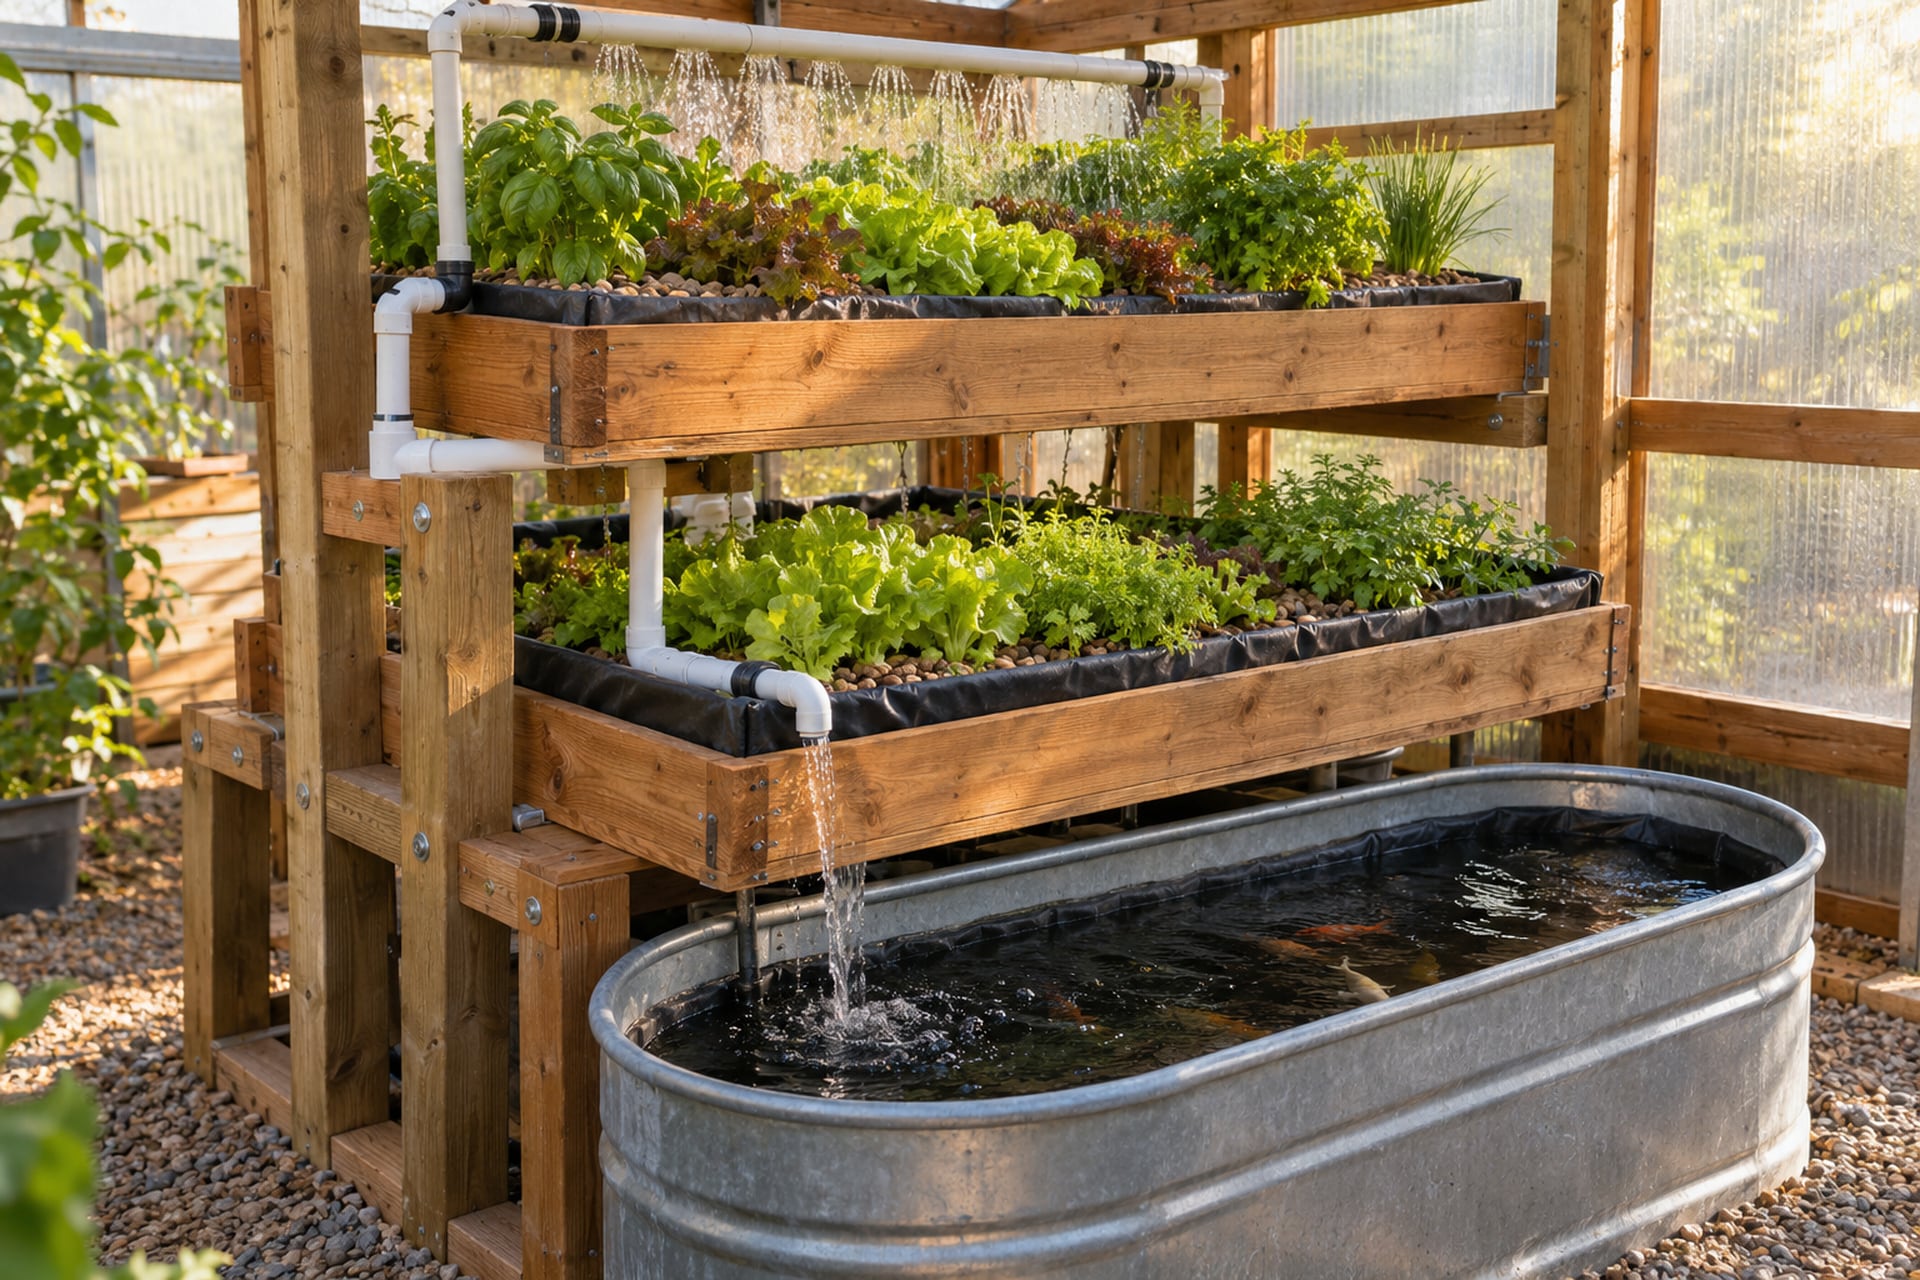
Learning how to build an aquaponics system is less about plumbing skill than about getting a few numbers right: how many fish for how much grow bed, how deep the bed, how much water the pump has to move. Get those right and a DIY aquaponics system is one of the most forgiving gardens you can build. This guide walks through the whole build in nine steps, from choosing the spot to the first harvest, with the numbers taken from the FAO aquaponics manual and US extension services, and with notes from my own backyard build along the way.
Everything you need is on this one page: the design choices, the sizing, a parts list and the step-by-step build, all checked against current extension and FAO guidance.
How an Aquaponics System Works
An aquaponics system joins a fish tank (aquaculture) to a soil-free garden (hydroponics) in one loop of water. Fish eat and excrete ammonia; bacteria in the system turn the ammonia into nitrite and then nitrate; plants take up the nitrate as fertilizer, and the cleaned water returns to the fish. Clemson Cooperative Extension sums up the loop in Aquaponics: System Layout and Components (Beecher, 2021): waste is carried to the filter, where solids are captured and bacteria carry out nitrification, and nutrient-rich water then feeds the plants before returning to the fish tank.
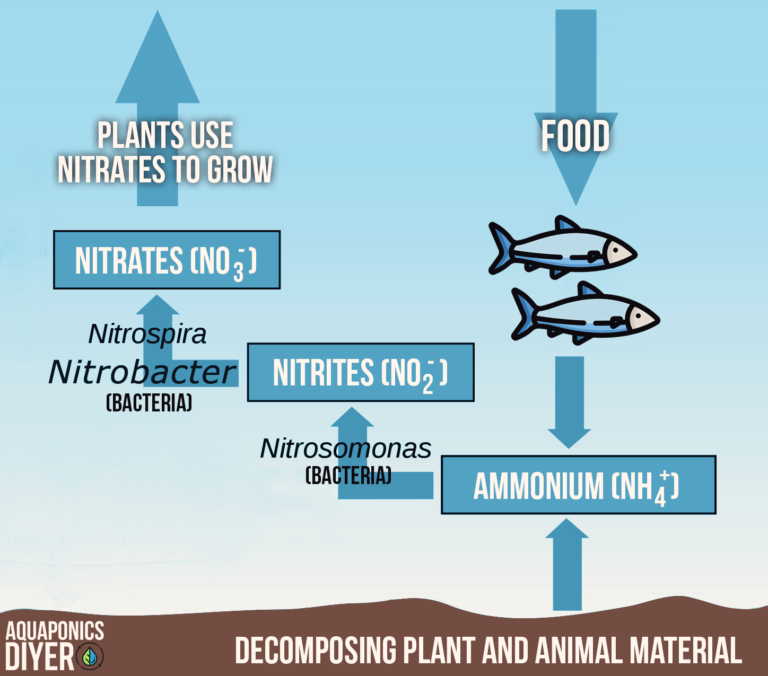
That gives you three living parts to look after, the fish, the plants and the bacteria, and the build is about giving all three what they need. If you are new to the idea, our what is aquaponics guide covers it in more depth.
Step 1: Choose the Location
A DIY aquaponics system can be built to fit almost any space, which is one of the best things about building your own. Popular spots indoors are a garage, a spare room or a kitchen corner; outdoors, a backyard, a patio, a balcony or the side of the house.
- Light. Plants need it and fish do not. FAO's manual (Somerville et al., Small-scale aquaponic food production, Technical Paper 589, 2014) says the fish tanks should be in the shade, ideally under a separate shading structure, to stop algae and keep the water temperature stable. Indoors, plan for grow lights.
- Climate. Oklahoma State's Principles of Small-Scale Aquaponics notes that in temperate zones, year-round production needs a greenhouse or a lit growing area. See our aquaponics greenhouse guide if you want to grow through the winter.
- Weight and level. Water weighs a little over 8 pounds a gallon, and a wet gravel bed much more. Choose solid, level ground or a floor that can take it.
- Power and water. You need an outlet for the pumps and an easy way to top up water.
- Room to grow. Leave space to add a second bed later; it is far easier than moving a full system.
I am lucky to have a backyard where the plants get plenty of sun. Readers in North America and Europe who do not will either move their system indoors under lights or put it in a greenhouse.
Step 2: Choose the Type of System
There are three common ways to grow the plants, and the choice shapes every other decision.
| System | How the plants grow | Filtration | Best for |
|---|---|---|---|
| Media bed | Rooted in gravel or clay pebbles that are flooded and drained | The media is the mechanical and biological filter | Beginners, mixed crops, tomatoes |
| Raft (deep water culture) | On foam rafts floating on 10 to 12 inches of water | Needs separate solids removal | Lettuce and herbs at volume |
| NFT | In pipes or gutters with a thin film of water | Needs a separate biofilter | Leafy greens, vertical setups |
Oklahoma State calls media beds easy and inexpensive to set up and a good choice for small systems, while raft and NFT are more management intensive and costly for a beginner. FAO strongly recommends media beds for small-scale aquaponics and calls them suitable for beginners because of their simplicity.
My own preference has always been gravel beds or floating rafts over NFT. A study by Wilson Lennard and Brian Leonard (Aquaculture International, 2006) compared the three in the same aquaponic test system and found the NFT channels removed less nitrate from the fish water and gave lower plant yields than the gravel bed and the floating raft, and that settled it for me. This guide builds a media bed system; the details of the bed itself are in our aquaponics grow bed guide.
Step 3: Size the System
Balance Fish and Plants by Feed
FAO balances an aquaponic unit with one number, the feed rate ratio: how many grams of fish feed go into the system each day for every square meter of growing space. Its recommended rates are 40 to 50 g per square meter per day for leafy greens and 50 to 80 g for fruiting vegetables, with fish eating about 1 to 2 percent of their body weight a day. FAO's worked example: to harvest 25 lettuces a week you need about 4 square meters of bed, 200 g of feed a day and 10 to 20 kg of fish.
| Grow bed area | Feed a day (leafy greens) | Fish to eat it |
|---|---|---|
| 4 x 4 ft (16 sq ft) | 59 to 74 g, about 2 to 2.5 oz | 7 to 16 lb |
| 4 x 8 ft (32 sq ft) | 119 to 149 g, about 4 to 5 oz | 13 to 33 lb |
| Three IBC beds (about 39 sq ft) | about 144 to 180 g, 5 to 6.5 oz | 16 to 40 lb |
These are our conversions of FAO's metric rates; the full table, with fruiting crops, is in the grow bed guide.
How Many Fish for Your Tank
Oklahoma State gives a beginner's rule of 1 pound of fish per 10 gallons of water at harvest, and its media bed fact sheet (Nitrification and Maintenance in Media Bed Aquaponics) calls 1 pound per 8 to 10 gallons a safe rate. The upper limit it cites from Rakocy's tilapia research is 0.5 pound per gallon, the most a system holds before growth slows.
That 1 pound per 10 gallons is exactly where I started: about one fish for every 10 gallons, so they had room to swim, and I added more over time as I watched how they did. Treat 0.5 pound per gallon as the absolute ceiling, and stay well below it on a first build.
How Big a Fish Tank
Oklahoma State says small-scale systems usually keep the fish tank under 500 gallons, with 300 gallons as the average. Plate-sized fish for the table need a tank of a decent size, while a 20 to 50 gallon tank is fine for ornamental fish and a few herbs. Our aquaponics fish tank guide compares the options.
Step 4: Gather the Components
The Southern Regional Aquaculture Center lists the essential parts of an aquaponic system as the fish tank, a way to remove solids, a biofilter, the plant growing area and a sump (Rakocy, Masser and Losordo, SRAC Publication No. 454). In a media bed system several of those collapse into one.
1. Fish Tank
Oklahoma State lists UV-protected plastic, fiberglass, metal or wood with a liner, IBC totes and barrels, with a round tank and a central drain as the best shape. Whatever you use must be food safe; a second-hand container should only ever have held food. Cover it to stop fish jumping and algae growing.
2. Solids Removal
Uneaten feed and fish waste have to be caught before they clog the system. In a small media bed system the bed does this job. FAO recommends adding a separate filter only when stocking goes above about 15 kg per cubic meter or feed above 50 g a day per square meter of bed; its simplest version is an old sock on the inlet pipe, rinsed daily.
3. Biofilter
The surface where nitrifying bacteria live. Clemson says a productive biofilter needs water flow, surface area and dissolved oxygen. In a media bed, every pebble is biofilter.
4. Grow Beds
About 12 inches deep and 3 feet wide, filled with 8 to 20 mm clay pebbles or volcanic gravel and flooded and drained by a bell siphon. Media options are compared in our clay pebbles guide.
5. Sump
The lowest tank, where water collects from the beds before the pump sends it back. FAO says it should hold at least 70 percent of the media bed volume. Small systems that drain straight into the fish tank can skip it.
6. Pump and Air
One submersible pump at the lowest point, sized to move all the water once or twice an hour (see our pump size chart), plus an air pump with air stones in the fish tank.
Parts list for a backyard media bed system
For one 12 inch grow bed over a fish tank of about 100 to 300 gallons. Add a bell siphon and valve for each extra bed.
-
1Grow bed
Rubbermaid Commercial Brute Stock Tank, 50 Gallon
A rigid, food safe tank that the listing gives as 52 x 31 x 12 inches: a ready-made 12 inch grow bed with no cutting.
-
2Bell siphon
Smoky Mountain Aquaponics Bell Siphon Kit for 8 Inch Media
Bell, slotted guard, bulkhead adapters and elbows, sized to stay below the rim of a 12 inch tank.
-
3Grow media
Hydroton Original Expanded Clay Pebbles, 50 Liter
Light, pH neutral clay listed at 8 to 16 mm, inside FAO's recommended size range.
-
4Water pump
VIVOSUN 800 GPH Submersible Pump
The listing gives 800 GPH at zero lift, 10 feet of maximum lift and a flow knob, enough for two turnovers an hour in most home systems.
-
5Inflow valve
Homewerks 1 Inch PVC Ball Valve
Trims the flow into the bed until the siphon cycles every 15 to 20 minutes.
-
6Air pump
EcoPlus ECOair 1 Commercial Air Pump
An 18 W air pump with a six-valve manifold, per the listing, to keep oxygen up in the fish tank and sump.
-
8Water testing
API Freshwater Master Test Kit
pH, ammonia, nitrite and nitrate tests for cycling and weekly checks.


Step 5: Build It
The order below works for any media bed system, from a single stock tank to an IBC build. FAO's free manual has complete, photographed plans in its Appendix 8 if you want to follow a design to the centimeter.
Assembling a media bed system
-
Place the fish tank
It is the heaviest part, so it goes first, on level ground, in the shade. If the pump will sit in it, FAO's advice is to keep the pump off the bottom so the tank can never be pumped dry.
-
Build the grow bed stand
Set the bed above the fish tank or sump on a frame or concrete blocks strong enough for wet media, so it drains by gravity. Level it carefully: FAO says a horizontal bed is vital for the bell siphon.
-
Fit the drain and bell siphon
Drill the bed floor for a bulkhead, fit the standpipe 1 to 2 inches below where the media surface will be, and stand the bell and media guard over it. Sizes are in the bell siphon guide.
-
Plumb the pump
Run the line from the pump to the bed with as few fittings as possible, since FAO says each one can cost up to 5 percent of the flow, and fit a ball valve where it enters the bed. If the return pipe dips into the fish tank, drill a small hole near its top so it cannot siphon the tank empty when the power goes off.
-
Test with water only
Fill the tanks and run the pump with the standpipe out so water flows straight back down. Fix every drip now; it is much harder with a bed full of gravel.
-
Add the media and tune the siphon
Rinse the media until the water runs clear, fill the bed, refit the siphon and adjust the valve until the bed fills and drains every 15 to 20 minutes.
-
Add aeration
Put air stones in the fish tank, and in the sump if you have one, and keep the electrics in a waterproof box on a GFCI outlet.
Step 6: Fill and Cycle the System
Choosing the Water
FAO calls collected rainwater an excellent source: usually neutral, soft and almost free of salts. Tap water is fine once the chlorine is gone; FAO says stored water loses its chlorine in upwards of 48 hours, faster with an air stone, but chloramines do not off-gas readily and need a dechlorinating treatment. Oklahoma State gives a cheap one: 500 mg of ascorbic acid (vitamin C) per 50 gallons removes chloramines quickly. Water from ponds or wells should be sterilized first, FAO adds, because it can carry disease.
Letting tap water stand removes chlorine; it does not supply the nitrifying bacteria. Those come from cycling the system, below.
Cycling: Growing the Bacteria
Oklahoma State says to allow at least four weeks for nitrification before growing anything, and describes a system as cycled when nitrate reaches 40 to 50 ppm with ammonia and nitrite at 0 to 0.25 ppm. You can cycle with hardy fish or without fish by dosing ammonia; our fishless cycling guide covers the method step by step.
Step 7: Add the Fish
Choose fish for your climate. Tilapia suit warm water, and Oklahoma State notes they grow best at about 85°F and little below 68°F; trout, bluegill, catfish and perch suit cooler conditions. Match the fish and the plants: Oklahoma State pairs warm water fish with warm season crops and cool water fish with winter crops.
To add them, Oklahoma State's method is to float the bag in the tank so the temperature evens out, then add small amounts of tank water to the bag over time before releasing the fish, and to avoid swings of more than 0.2 pH units. Feed a floating pellet sized for the fish; Oklahoma State gives 28 to 36 percent crude protein for tilapia. Compare species in our best fish for aquaponics guide, or read the tilapia guide.
Step 8: Add the Plants
Start with leafy greens and herbs. Oklahoma State names lettuce, basil, Swiss chard, bok choy and watercress as good first crops because they need fewer nutrients, and notes that fruiting crops such as tomatoes and peppers need more. Transplant seedlings rather than sowing seed: the same fact sheet says direct seeding does not work well in aquaponics. Stagger your plantings so you harvest a little every week, which also keeps the nutrient demand steady. The full list is in our best plants for aquaponics guide.
Step 9: Look After It
Once it is running, a media bed system asks for little: feeding the fish is the only daily input, and the rest is checking. If you add lights or a heater, put them on timers.
| How often | Task | Source |
|---|---|---|
| Daily | Feed the fish what they eat in a few minutes; check the pump is running and water is flowing; watch fish behavior | Oklahoma State |
| Weekly | Test pH, ammonia, nitrite, nitrate and temperature; aim for pH 6.8 to 7.2 | Oklahoma State |
| Weekly | Top up evaporation with dechlorinated water; small systems lose 1 to 5 percent a day | Oklahoma State |
| Every 2 to 3 weeks | Clean the pump's intake filter | FAO |
| At each harvest | Remove all roots and leaves from the media | Oklahoma State |
A liquid test kit such as the API Freshwater Master Test Kit covers the weekly tests.
Common Problems and How to Fix Them
| Problem | Likely cause | What to do |
|---|---|---|
| Fish gasping at the surface | Low oxygen or high ammonia | Check the pump and air stones, test ammonia, cut feeding |
| Ammonia or nitrite above 0.25 ppm | Too much feed for the biofilter, or solids building up | Reduce feeding, remove solids, partial water change (Oklahoma State) |
| Yellow leaves | Iron, potassium or calcium deficiency, or pH too high | Oklahoma State: add chelated iron, potassium or calcium hydroxide; check pH |
| pH falling steadily | Normal: nitrification releases acid | Add a base such as calcium or potassium carbonate in small doses |
| Green water | Light on the water | Shade the fish tank and keep the water level below the media surface |
| Bed stays flooded or never drains | Bell siphon out of tune | See the troubleshooting table in our bell siphon guide |
| Power cut | No circulation or aeration | Oklahoma State: pour sump water into the fish tank every 1 to 2 hours until power returns |
DIY or a Ready-Made Kit?
Building your own costs less for the size, fits any space, and teaches you how every part works, so you can fix and expand it without help. That knowledge is what I value most from my own builds. The trade-off is time: planning, cutting, plumbing and tuning take a few weekends. If you would rather start growing this month, a pre-built system skips all of it; see our best aquaponics kits, or a home aquaponics setup for small spaces.
How to Build an Aquaponics System: FAQ
It depends far more on size and materials than on the method. A small DIY system built from a stock tank or used food grade IBC totes, a pump and media costs much less than a pre-built kit of the same size. FAO notes the fish tank alone can be up to 20 percent of a unit's cost.
The usual ones are ammonia spikes from overfeeding or a young biofilter, low oxygen when a pump fails, pH drifting down, nutrient deficiencies such as iron showing as yellow leaves, algae where light reaches the water, and bell siphons that stop cycling. Weekly water tests catch most of them before the fish show stress.
It needs electricity around the clock, a few weeks of cycling before it produces, and daily attention to the fish. Startup costs are higher than a soil garden, and you cannot spray most pesticides because they can harm fish. Oklahoma State also notes heating water in cold climates can make small systems expensive to run.
Yes. FAO Technical Paper 589, Small-scale aquaponic food production, is free to download and its Appendix 8 has step-by-step, photographed plans for media bed, NFT and raft units built from IBC totes. Alabama Extension also publishes a free six-part video series on building an IBC aquaponics system.
Yes. A grow tray set on top of an aquarium, filled with clay pebbles and fed by a small submersible pump, works on the same principle at a tiny scale. Keep the fish stocking light, stick to herbs and greens, and use a small bell siphon or a constant trickle back into the tank.
Leafy greens and herbs. Oklahoma State names lettuce, basil, Swiss chard, bok choy and watercress as good choices for beginners because they need fewer nutrients than fruiting crops and can grow with steady nutrient levels. Lettuce is usually the first harvest from a new system, a few weeks after transplanting.
-
 Aquaponics Grow Bed: How Deep, How Big and What to Fill It WithDepth, size and media for the beds.
 -
 Bell Siphon: How It Works and How to Build OneHow it works, sizes and a DIY build.
 -
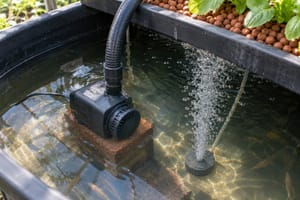 Aquaponics Pump: How to Size It and Which One to BuySize chart and the pumps to buy.
 -
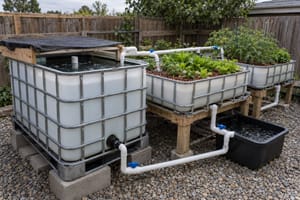 IBC Aquaponics: How to Build a System From IBC TotesA full system from IBC totes.
Grow along with us
New guides and seasonal tips for fish, plants and DIY builds, about once a month.